Supporting safe areas
On modern devices, there are often areas of the screen that are partially or fully obscured by:
- Physical notches
- Status bar overlay
- Home activity indicator on iOS
- Navigation bar on Android
The area not overlapped by such items is referred to as "safe area".
React Navigation automatically applies proper insets to the built-in UI elements of the navigators, such as headers, tab bars, and drawers, to avoid being overlapped by such items. But your own content may still need to handle safe areas to ensure that it isn't obscured by these items.
It's tempting to solve it by wrapping your entire app in a container in a SafeAreaView. But in doing so, we waste a bunch of space on the screen, as pictured in the image on the left below. What we ideally want is the image pictured on the right.
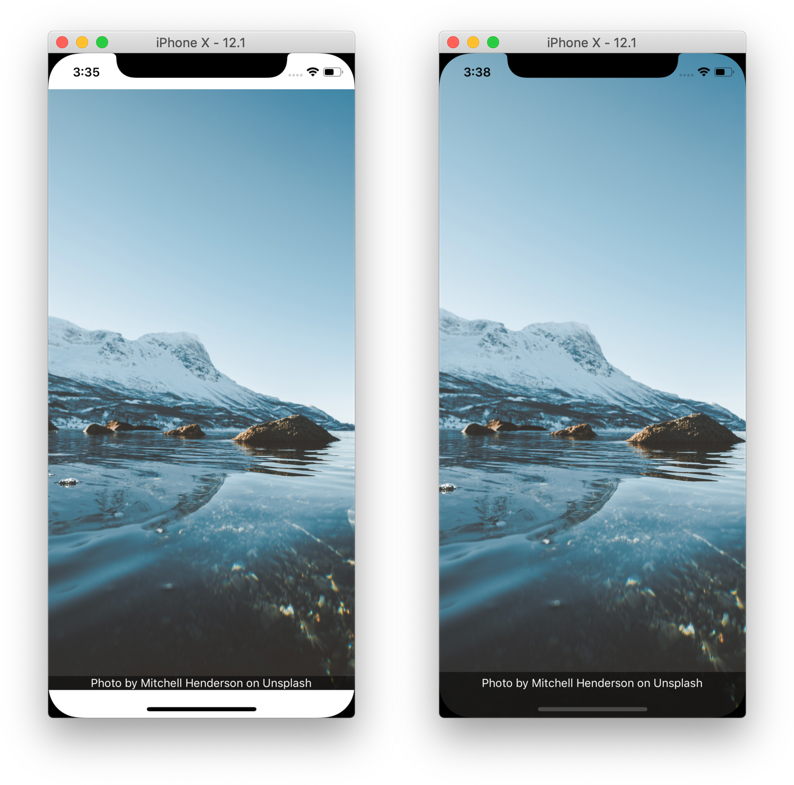
When handling safe areas, the goal is to:
a. Maximize usage of the screen b. Avoid hiding content or making it difficult to interact with by having it obscured
The guide covers different scenarios and best practices for handling safe areas keeping these goals in mind.
Edge-to-edge on Android
On Android, edge-to-edge means that your app draws under translucent system bars, such as the status bar and navigation bar. This behavior is similar to iOS.
Starting with Android 15 (API level 35), apps that target API 35 are edge-to-edge by default when running on Android 15 or later. On Android 16 (API level 36), opting out of edge-to-edge is no longer supported.
React Native supports edge-to-edge configuration from version 0.81. You can enable edge-to-edge for Android versions below 16 by setting the edgeToEdgeEnabled property in android/gradle.properties:
edgeToEdgeEnabled=true
We recommend enabling edge-to-edge for Android to ensure that safe area is handled consistently across platforms and Android versions.
This React Native option currently only works when your app uses the default ReactActivity, as documented in the React Native Android template. If your app hosts React Native in a custom Android Activity or Fragment, you need to configure edge-to-edge in native Android code yourself.
The SafeAreaView component
While React Native exports a SafeAreaView component, it is not adequate:
- It only supports iOS with no support for Android
- It can't be used to apply insets to scrollable content, which is a common use case
- If a screen containing safe area is animating, it causes jumpy behavior
So we recommend to use the useSafeAreaInsets hook from the react-native-safe-area-context library to handle safe areas consistently. On iOS, you can also use contentInsetAdjustmentBehavior="automatic" on scroll views to handle safe areas automatically.
The SafeAreaView component from react-native-safe-area-context works on Android, but still has the other issues mentioned above.
The useSafeAreaInsets hook
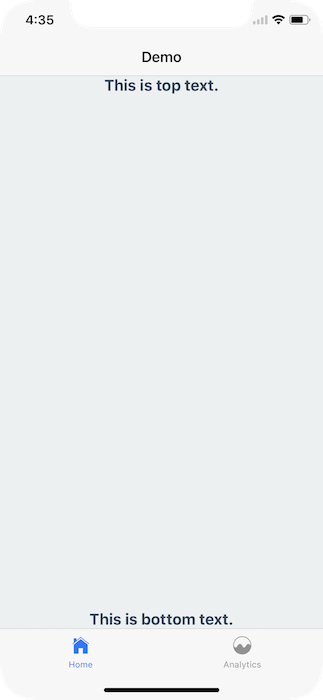
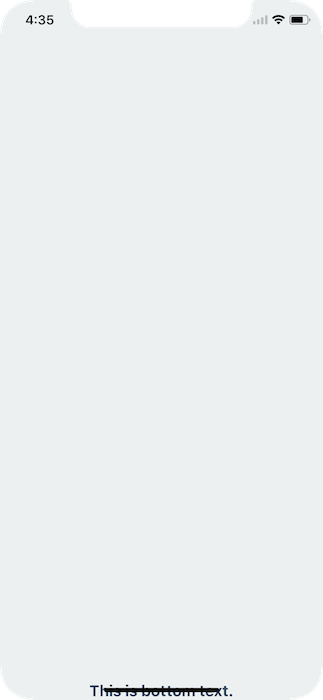
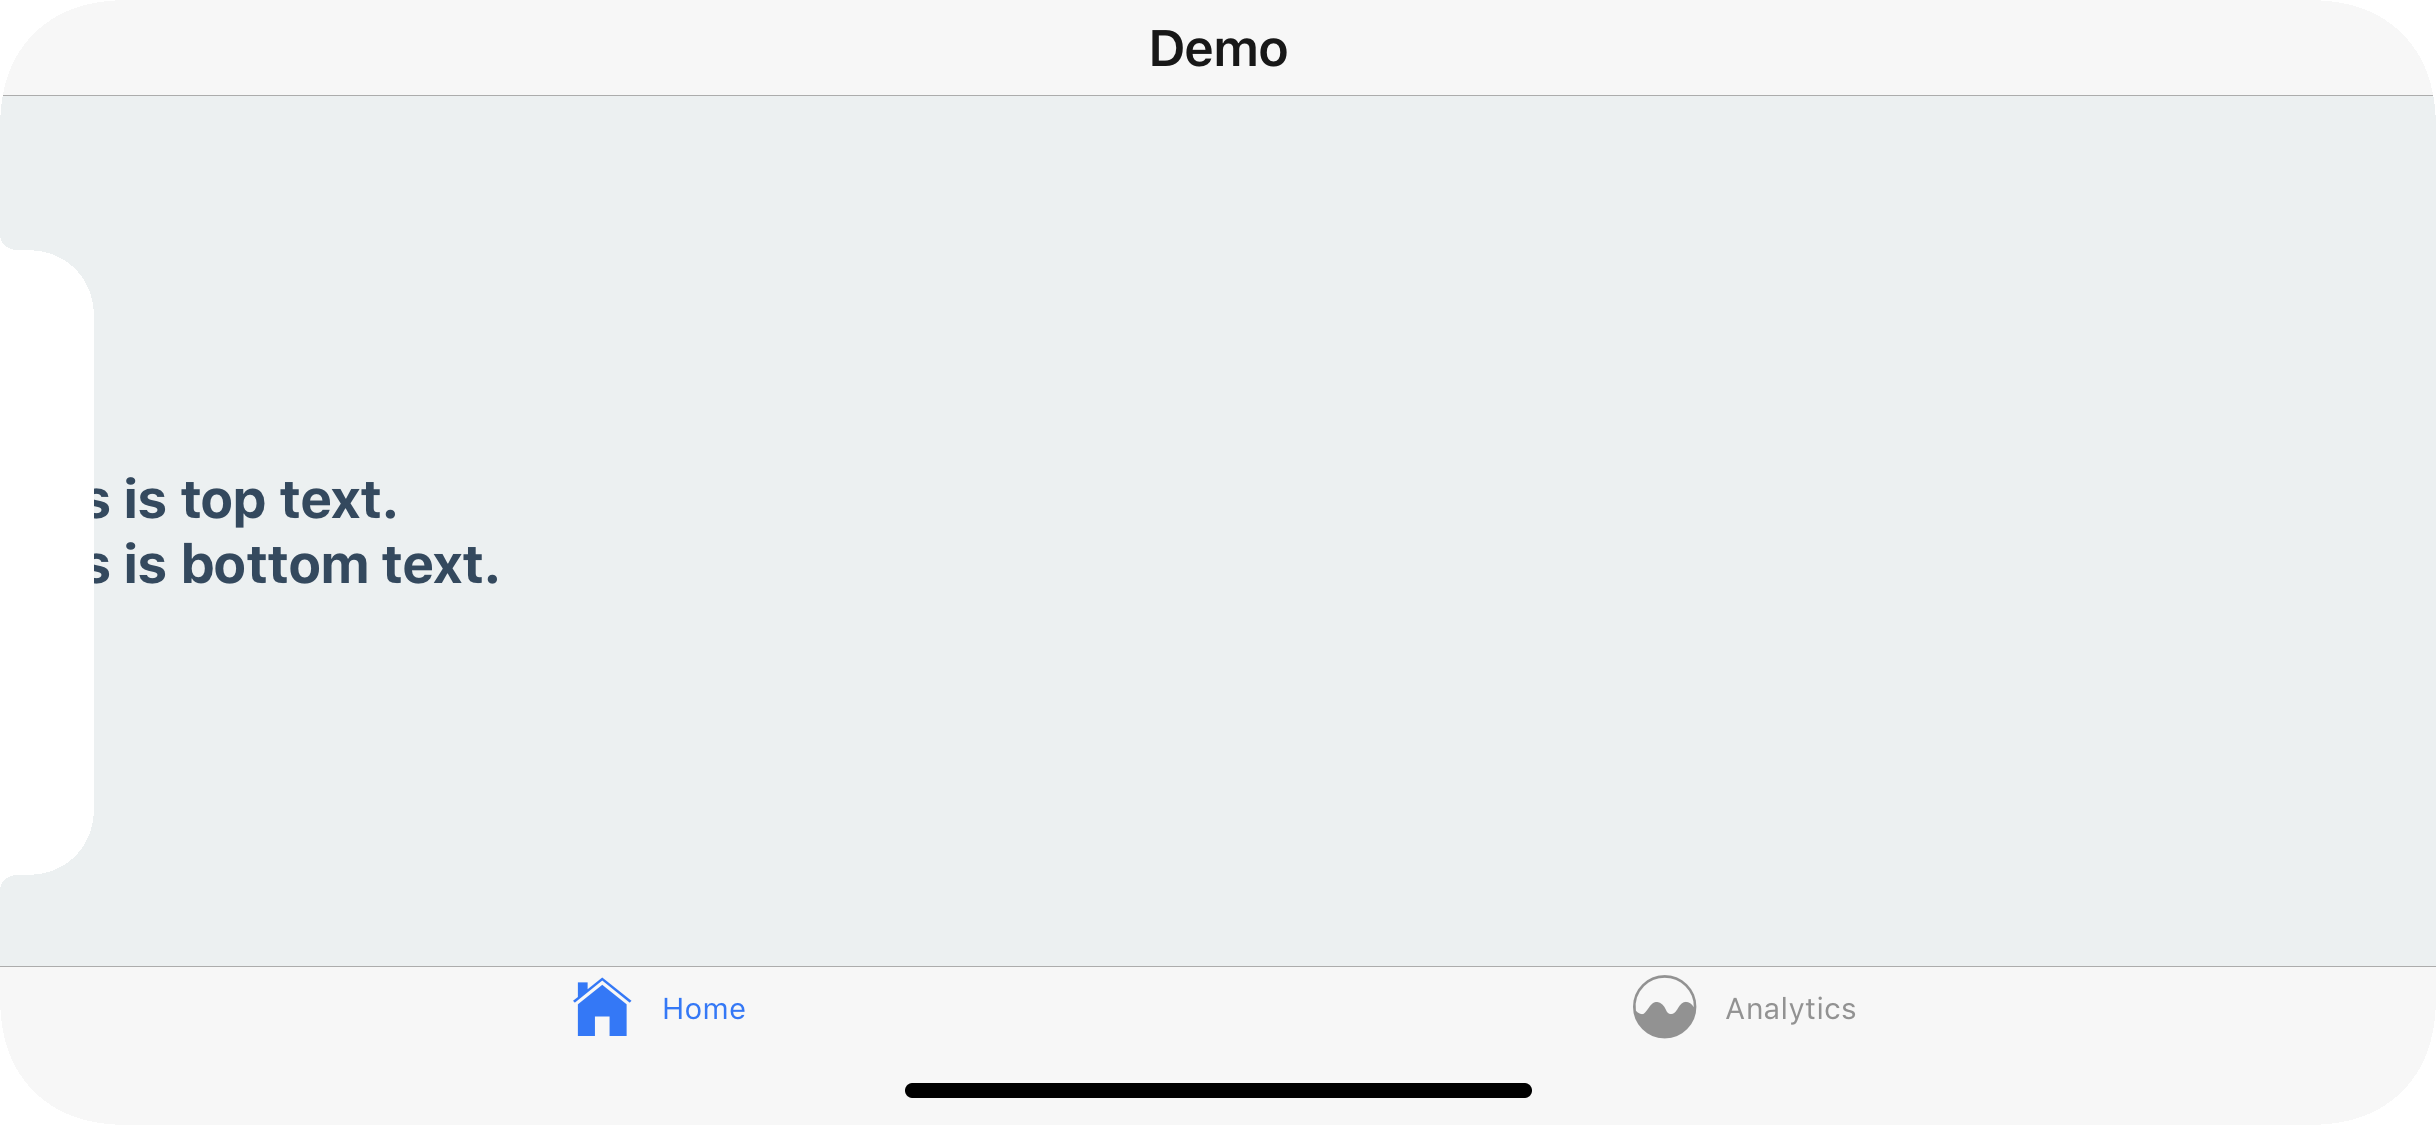
If you're using custom header, tab bar etc. or hiding the default ones, it's important to ensure your UI is within the safe area.
For example, if the header and the tab bar are hidden, the content gets covered by the status bar and the bottom bar:
- Static
- Dynamic
const MyTabs = createBottomTabNavigator({
  initialRouteName: 'Analytics',
  tabBar: () => null,
  screenOptions: {
    headerShown: false,
  },
  screens: {
    Analytics: Demo,
    Profile: Demo,
  },
});

const RootStack = createNativeStackNavigator({
  initialRouteName: 'Home',
  screenOptions: {
    headerShown: false,
  },
  screens: {
    Home: MyTabs,
    Settings: Demo,
  },
});
const Tab = createBottomTabNavigator();

function MyTabs() {
  return (
    <Tab.Navigator
      initialRouteName="Analytics"
      tabBar={() => null}
      screenOptions={{
        headerShown: false,
      }}
    >
      <Tab.Screen name="Analytics" component={Demo} />
      <Tab.Screen name="Profile" component={Demo} />
    </Tab.Navigator>
  );
}

const Stack = createNativeStackNavigator();

function RootStack() {
  return (
    <Stack.Navigator
      initialRouteName="Home"
      screenOptions={{
        headerShown: false,
      }}
    >
      <Stack.Screen name="Home" component={MyTabs} />
      <Stack.Screen name="Settings" component={Demo} />
    </Stack.Navigator>
  );
}
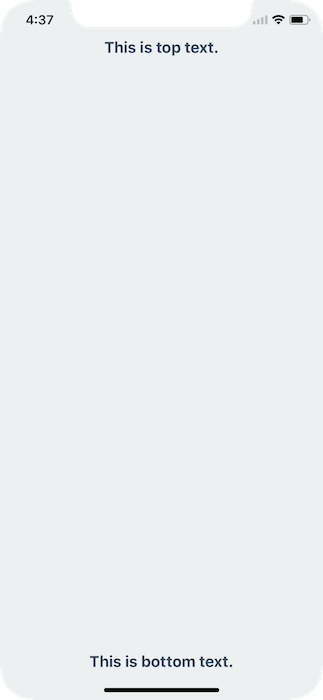
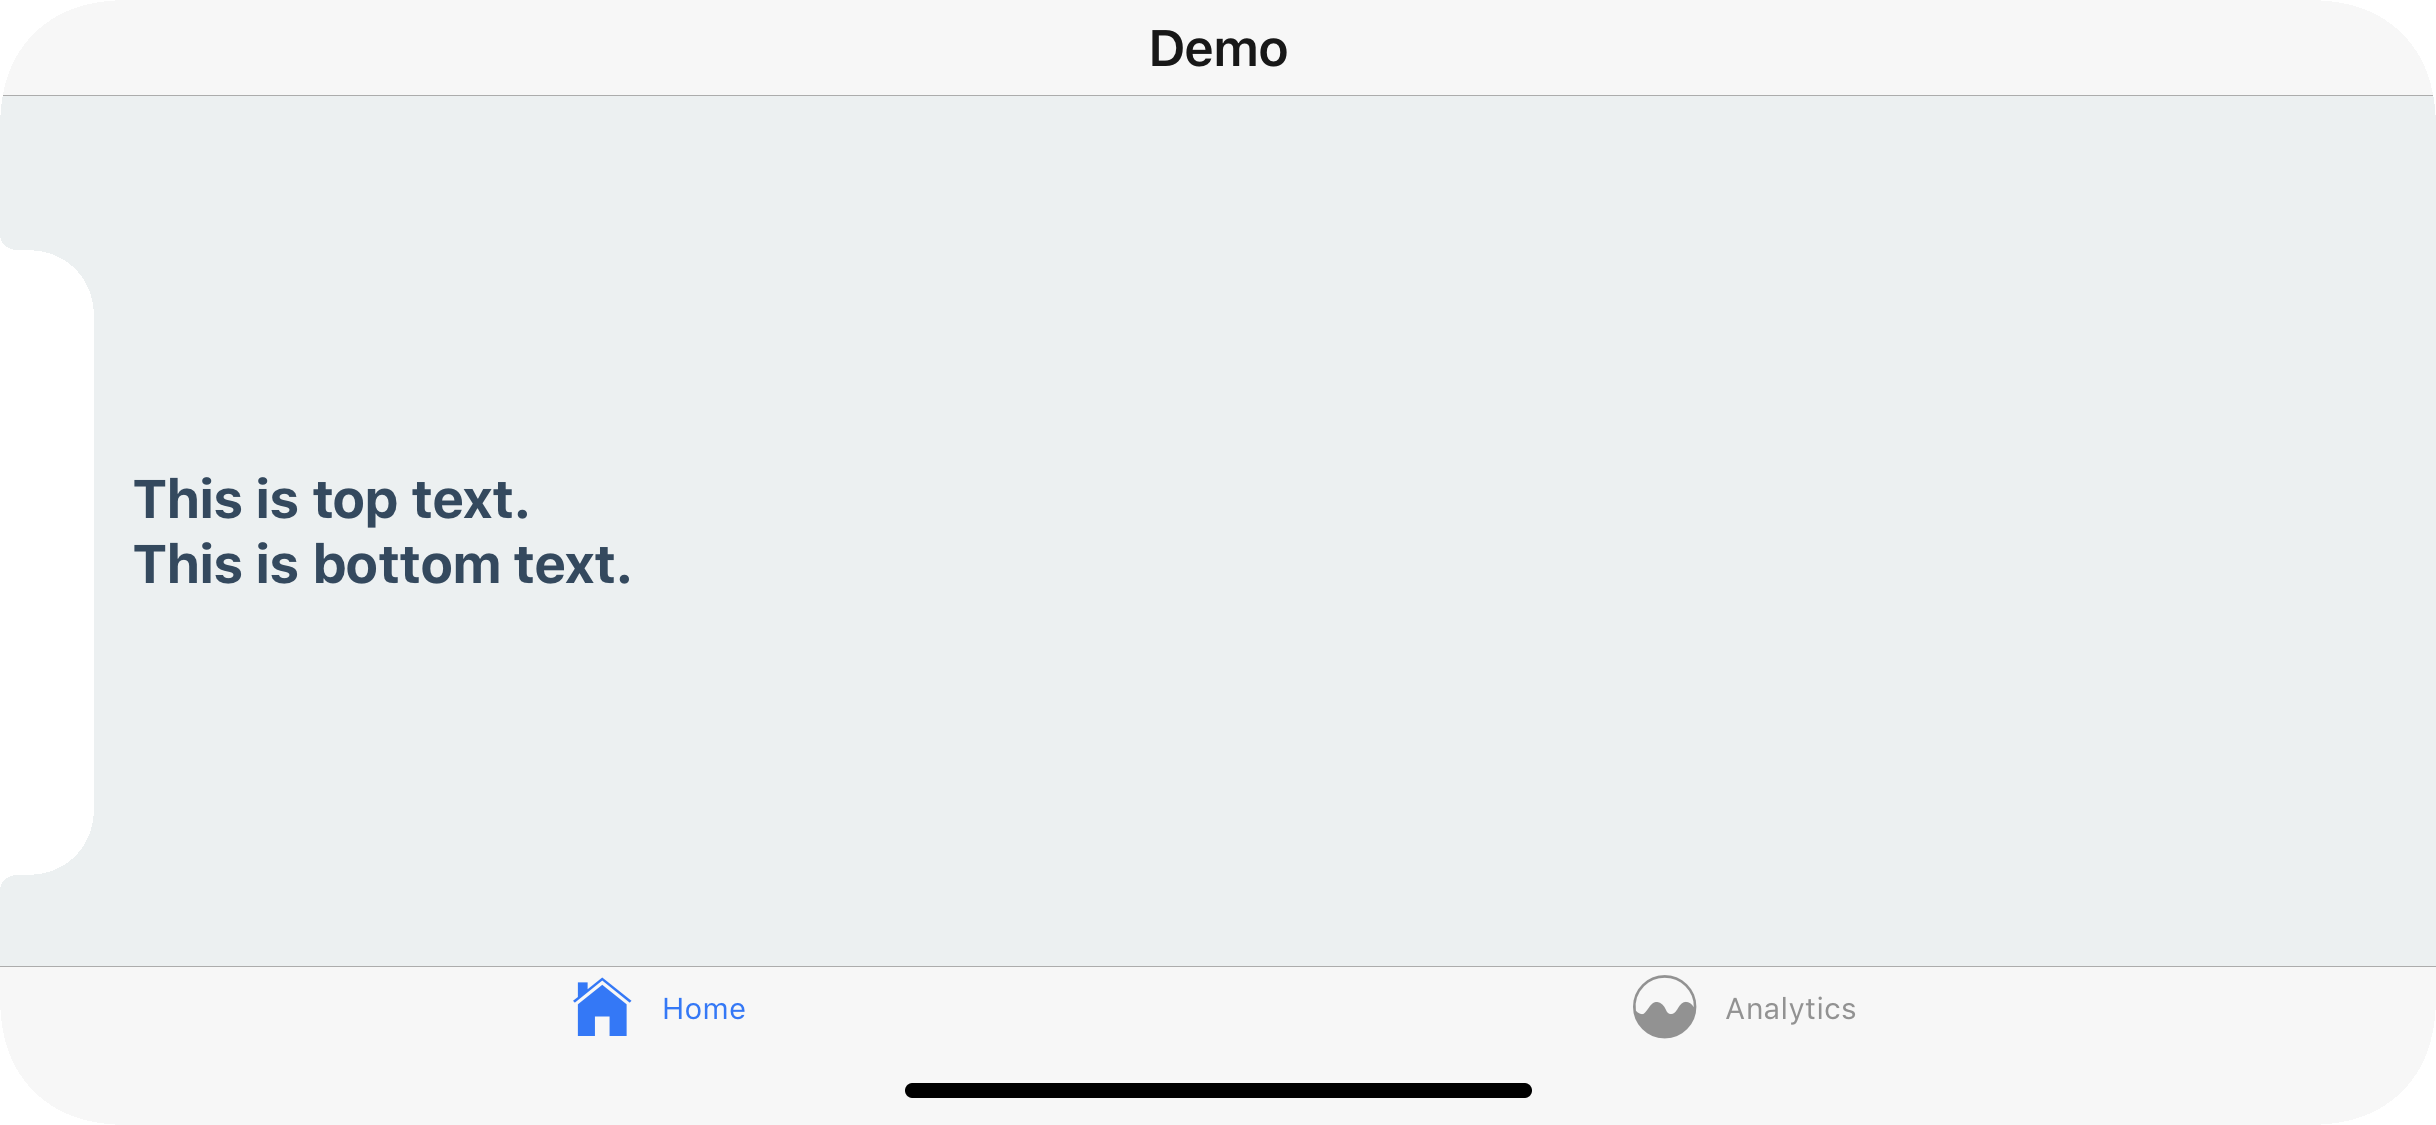
To fix this issue you can apply safe area insets on your content. This can be achieved using the useSafeAreaInsets hook from the react-native-safe-area-context library and applying the insets as padding to your content:
- Static
- Dynamic
import { useSafeAreaInsets } from 'react-native-safe-area-context';

function Demo() {
  const insets = useSafeAreaInsets();

  return (
    <View
      style={{
        flex: 1,
        justifyContent: 'space-between',
        alignItems: 'center',
        paddingTop: insets.top,
        paddingBottom: insets.bottom,
        paddingLeft: insets.left,
        paddingRight: insets.right,
      }}
    >
      <Text>This is top text.</Text>
      <Text>This is bottom text.</Text>
    </View>
  );
}
The useSafeAreaInsets hook returns the insets for all sides of the screen, so you can choose to apply only specific insets if you want. For example, if your content doesn't extend to the bottom of the screen, you can choose to only apply the top inset.
Using both SafeAreaView component and useSafeAreaInsets hook together can cause flickering as they may update at different times. So we recommend always using the useSafeAreaInsets hook instead for consistent behavior.
Landscape Mode
Even if you're using the default navigation bar and tab bar - if your application works in landscape mode it's important to ensure your content isn't hidden behind the sensor cluster.
To fix this you can, once again, apply safe area insets to your content. This will not conflict with the navigation bar nor the tab bar's default behavior in portrait mode.
Scrollable content
When the content of a screen is scrollable, on iOS, you can use contentInsetAdjustmentBehavior="automatic" on ScrollView, FlatList, SectionList to automatically apply the insets to when needed. This applies space so the content isn't hidden behind the status bar or the home indicator, but can scroll under them:
import * as React from 'react';
import { ScrollView, Text } from 'react-native';

export default function Screen() {
  return (
    <ScrollView
      contentInsetAdjustmentBehavior="automatic"
    >
      {/* Your scrollable content goes here */}
    </ScrollView>
  );
}
On Android, contentInsetAdjustmentBehavior is not supported. So you need to apply the insets manually with useSafeAreaInsets:
import * as React from 'react';
import { ScrollView, Text, Platform } from 'react-native';
import { useSafeAreaInsets } from 'react-native-safe-area-context';

export default function Screen() {
  const insets = useSafeAreaInsets();

  return (
    <ScrollView
      contentInsetAdjustmentBehavior="automatic"
      style={
        Platform.OS === 'android'
          ? {
              paddingTop: insets.top,
              paddingBottom: insets.bottom,
              paddingLeft: insets.left,
              paddingRight: insets.right,
            }
          : null
      }
    >
      {/* Your scrollable content goes here */}
    </ScrollView>
  );
}
Summary
- Enable to edge-to-edge on Android by setting
edgeToEdgeEnabled=trueinandroid/gradle.propertiesfor safe area to work consistently - Use
useSafeAreaInsetshook fromreact-native-safe-area-contextinstead ofSafeAreaViewcomponent - For
ScrollView,FlatList,SectionList, etc. on iOS, prefercontentInsetAdjustmentBehavior="automatic" - Don't wrap your whole app in
SafeAreaView, instead apply the styles to content inside your screens - Apply only specific insets using the
useSafeAreaInsetshook for more control